|
Up
Hardware
Sales/Swap
Overclockers' Forum
PC Asylum's
Price List
Hardware One
Talk to me

I got it for free at http://come.to
| |
Chaintech 6BTM (II) - A personal experience
by Kapo (17/8/98)
Prior to this, I've been doing some intensive researches, spending
countless hours browsing through the newsgroup and reading reviews from various sources.
Overseas site like Anandtech, Tom's Hardware, Ultimate PC, Unofficial BX6 Homepage and Overclockers' Workbench have very good reviews as well
as useful information on anything about PCs. Anandtech has a very detailed write-out
on "How to built
your own PC". I won't repeat that. My page here will have more pictures, less
words and some simple mistakes that only a beginner like me can relate. Before this I was
using my good old Pentium 133 which I stick on to it because of budget, of course. Then I
stumbled upon Overclockers' Workbench which
reviewed something which is cheap and good..... so I tried...
Stuff I bought : (12 Aug 98)
Celeron 266 (SL2QG) - S$ 158
Chaintech 6BTM Motherboard - S$ 199
32mb PC66 SDRAM - S$ 60
ATX Case - S$ 90
Total Spent - S$ 507
The rest of the parts will be robbed from my P133. Now I'm ready !
Note : If you want a more detail review of Chaintech motherboard, you can visit here. Or, you can look up Tom's
Hardware or Anandtech for their comparison of BX motherboards.


Fitting the motherboard into the case
There are many types of cases, click here to
read more about ATX cases, or here to read about
Celeron with ATX cases. Tall towers will have lots of space for you to maneuvre easily
within the case. Smaller ones require you to squeeze your way around. Some have pullout
trays as shown in the pictures. In any case, try to get one with a side that can be slide
opened without unscrewing from behind. Mine don't.... I found out the hard way :-(
But there is one problem with my kind of
case .... you need to have all the cables and connectors that are long enough to allow you
to pull out the tray. My case's 'power switch' and 'reset' cables are not long enough and
I need to look for some extension to these wires.
Wiring up your motherboard
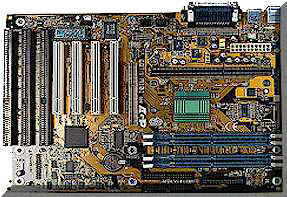
Chaintech 6BTM
It shouldn't be difficult to determine which way your motherboard should be placed inside
your case. All BX boards should have the same layout generally, with some small difference
in placement of power connectors.
You may want to put in your new Celeron first onto your board. I don't
have a picture of a bare board with the CPU. Hope you can orientate and visualize the
position.
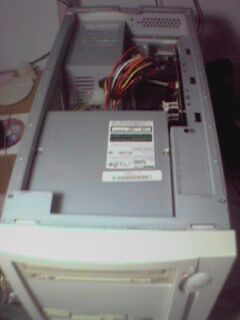
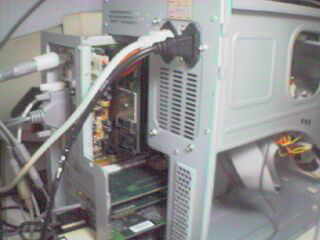
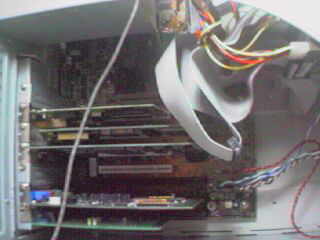
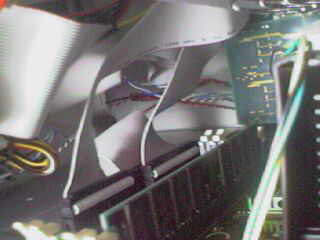
Top front view of the case
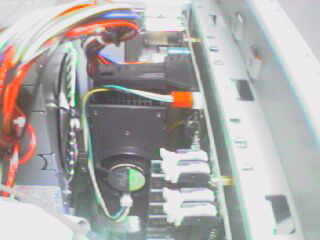
Same picture, zoomed in on the CPU,
which is near the top and aft of the case.
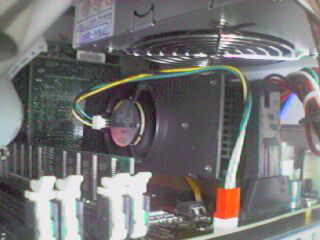
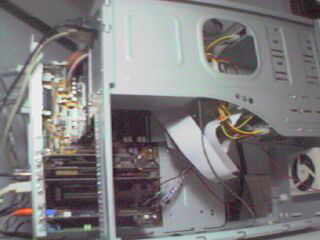
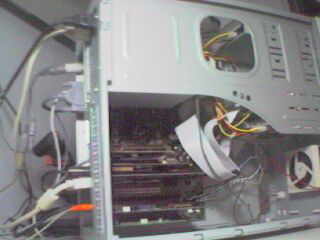
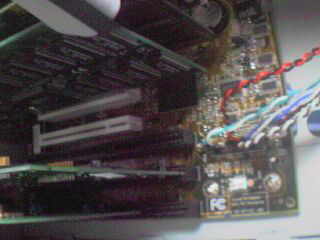
Same picture, upright view
(relative to motherboard)
There are a couple of things to take note. Do not be too gentle on the Celeron. My first
attempt to start up failed was due to the CPU not sitting fully into the slot. If you take
a close look at the 'U-shape' at the bottom of the CPU, that MUST not have have any gap
when sitting in the slot 1.
The fan that comes with your boxed Celeron is good enough for overclocking. Don't worry
about getting better fans.
Other comments : Notice the small brown stick at the bottom touching the CPU ? That is one
of the unique features of Chaintech 6BTM. That stick is a CPU temperature sensor, and it
gives much more accurate readings of the temperature of your CPU as it is touching it. So
far other boards' sensor are flat on the board.
This is more pertinent to the casing. Notice my power supply fan is actually blowing at
the CPU ? You may say that this will increase the temperature of the CPU. I've asked that
question before but no one can give me an answer. So I took the risk and tried. Actually
the heat from the power supply is not very hot. The blast from the strong fan actually
feels quite cool to the touch. The temperature of my CPU (not motherboard) hovers around
38 - 41 degrees and the motherboard at 34 - 37 degrees depending on usage. It will be
better to get another exhaust fan near that area to suck the hot air out of the case.
(Which is what I intend to do)
From this picture, you will also notice that the rams are fitted right in front of the
CPU.

Wiring up your motherboard (cont)
Connect all the casing's cables onto the motherboard.
These cables should be labelled 'power switch',
'hardisk LED', 'power LED', etc. Just follow your manual's instructions. BTW, these are
the cables that prevented me from sliding out the tray from behind 'cos they are too
short.
You can start to slot in your PCI and ISA cards into their respective slots.
Next, arrange your hardisk, floppy disk drive, CD Rom and screw them into the cage near
the front of your case. Connect your IDE cables for your hardisk and floppy disk drive to
the IDE bus. Normally, Bus 1 is for your hardisk and BUS 2 is for your CD Rom. The Floppy
disk connector will go to its own floppy disk bus.
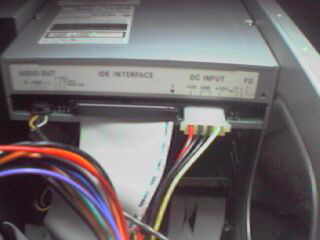
Back of CD Rom
Back of Hardisk
IDE Bus. The chaintech's is
located in front of the ram slots.
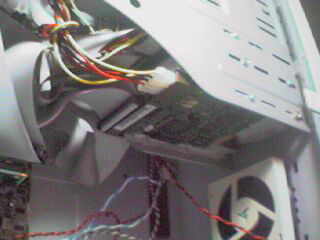
You can choose any power cables and plug them into the devices. Your devices should label
which way to connect the cables. If not, at least they should label the voltage for which
pins. Look at your power supply for the numbers to match the colors. Anyway, if you don't
have it, here you are :
Red ---> +5VDC
Yellow ---> +12VDC
White ---> -5VDC
Blue ---> -12VDC
Black ---> GND
Note : Try not to share your power from your fans with your hardisk or CD-Rom.
Check the jumpers. Follow your manual's instructions on what to set.
Now you are almost done. After your last check you can now connect the main bunch of power
cables from your power supply to your motherboard. The cables are all bunch up with
different colours. Again read your manual ! Make sure you don't insert the wrong way ! It
should be able to slot in only in one direction.
Connect your keyboard, mouse, etc first and always leave the main power switch to the
last.
Now cross your fingers and turn on the power. If there is no explosion, good. If your PC
booted and post your CPU's speed, better. If nothing is moving, or something is moving but
don't seem right, don't find me ! Re-check everything again. Remember to unplug the main
switch before doing anything.
Problems
I was still using Win95 OSR2 when I did all these. When my PC booted, it refuses to go
into windows. Always windows protection error, go through safe mode, unable to pin point
the source of error, ended up re-installing windows. I don't know if this is the norm if
you just change your motherboard without re-installing windows. The better option, if you
can, is to start from a brand new hard disk and install a new window after changing
motherboard. Other Win95 related problems like Bus mastering problem, AGP support, etc,
are well documented in Chaintech's website, with solutions given.
Overclocking
After configuring my Win95 back to original state, I began to think about overclocking
(the main reason for buying Celeron). To overclock this baby, an overclocker's bios is
needed from Chaintech's website. The bios update was a breeze, however please read the
instructions carefully as you may have to exchange your board if it fails. Soon I was
playing around with the numbers in the bios page. The speed supported are
66/75/83/100/103/112/133 MHz with multipliers up to 5.5x. Everything is controlled from
the bios page, no jumper settings required.
The first speed I tested was 4x100 and the system ran smoothly like it is meant for this
speed. Went up to 4x10³ and 4x112 with no problems, but failed to boot at 4x133 (too
ambitious considering the rams I'm using). After failing at 133MHz, all I need to do is to
hold on to the 'Home' key and reboot the PC, and Presto ! it is back to 266MHz. The CPU
voltage is not adjustable so for all test the voltage remained at 2.0V. I played around
with the Ram timings and found that no matter what I choose, there seems to be no
difference at all. The selections are Auto, CAS 2 and CAS 3. Hmmm.... weird... anyone can
enlighten me on this ? One thing I noticed was that the CPU temperature does not differ
much no matter what speed I use. Be it 400MHz or 448MHz, the temperature hovers between
37-41 degrees depending on usage. This temperature is still considered cool as the Celeron
is able to take up to 85 degrees C ! Don't believe me ? See here.

Shepherd monitoring program
that comes with 6BTM
PC configuration :
Intel Celeron 266 (SL2QG)
Chaintech 6BTM BX Motherboard
32Mb Samsung PC66 SDRAM (...-G10)
ET 6000 2D Card (PCI)
Cardex 3Dfx Voodoo 1 (PCI)
3Com 10/100 Base 3C905TX (PCI)
AWE64 Value (ISA)
CH Gamecard (ISA)
CH F16 Combatstick
TEAC 6X CD-Rom
IBM 1.7 GB HD (3yrs old)
Quantum 3.2 GB HD (2 yrs old)
Wintune 98 results : The first result is for 400MHz and second for 448MHz (dunno why
Wintune detect it as 437MHZ)
| CPU |
(1) Intel Pentium II with MMX@400 MHz |
| Video Board |
TLI ET6000/ET6100 16-bit Safe/Compatible
4.10.01.0064 |
| Video Mode |
800x600@16bits/pixel |
| RAM |
32 MB |
| OS |
Windows 95b |
| Area Tested |
Value |
| CPU Integer |
1139.898 MIPS |
| CPU Floating Point |
460.7141 MFLOPS |
| Video(2D) |
50.35787 MPixels/s |
| Direct3D |
40.90505 MPixels/s |
| OpenGL |
11.863 MPixels/s |
| Memory |
612.3068 MB/s |
| Cached Disk |
70.54266 MB/s |
| Uncached Disk |
1.371178 MB/s |
| CPU |
(1) Intel Pentium II with MMX@437 MHz |
| Video Board |
TLI ET6000/ET6100 16-bit Safe/Compatible
4.10.01.0064 |
| Video Mode |
800x600@16bits/pixel |
| RAM |
32 MB |
| OS |
Windows 95b |
| Area Tested |
Value |
| CPU Integer |
1273.598 MIPS |
| CPU Floating Point |
515.3124 MFLOPS |
| Video(2D) |
53.55185 MPixels/s |
| Direct3D |
41.54745 MPixels/s |
| OpenGL |
13.19557 MPixels/s |
| Memory |
687.0045 MB/s |
| Cached Disk |
82.52969 MB/s |
| Uncached Disk |
1.367518 MB/s |
Well, since the difference in performance was not much, I'm happy to run the system at
400MHz. At least now all my old 3D games are playable, in fact silky smooth. I'll just
wait for those better rams that can run at 133MHz to become cheaper before I try the
4x133MHz.
Comments ? Drop me a mail !
[email protected]
13 September 1998 11:34 AM
|